The DailyStory marketing automation platform includes support for transactional email. In this tutorial we’re going to create a transactional email and send it using the DailyStory APIs.
DailyStory supports 2 ways to send transactional email:
- Send the full email to the API
- Use an email template and send tokens to the API
In most cases, and for the purpose of this tutorial, use option 2 as this is the simplest way to send emails.
Create your transactional email
The first step is to create your transactional email in DailyStory. If you don’t have a DailyStory account, you can create one for free.
There are several options for creating your transactional email:
- Import your own HTML;
- Design your own email with our drag-and-drop designer;
- Use one of our built-in templates;
- Or use the API to create an email.
We recommend using a built-in template because it’s already designed to be mobile friendly.
Using a built-in template
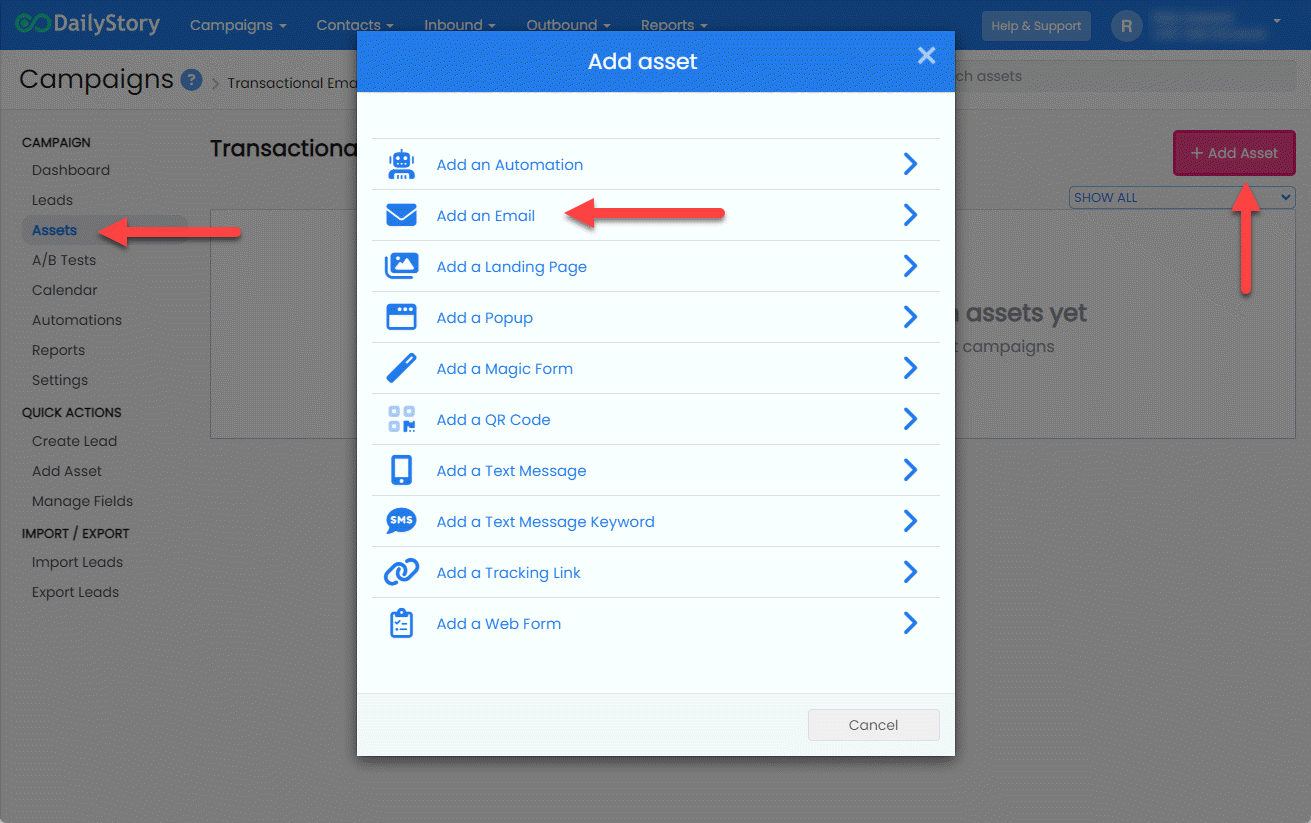
Login to your DailyStory account and create a new campaign, “Transactional Email Example”. In the campaign navigate to Assets, click + Add Asset, and from the popup click Add an Email:
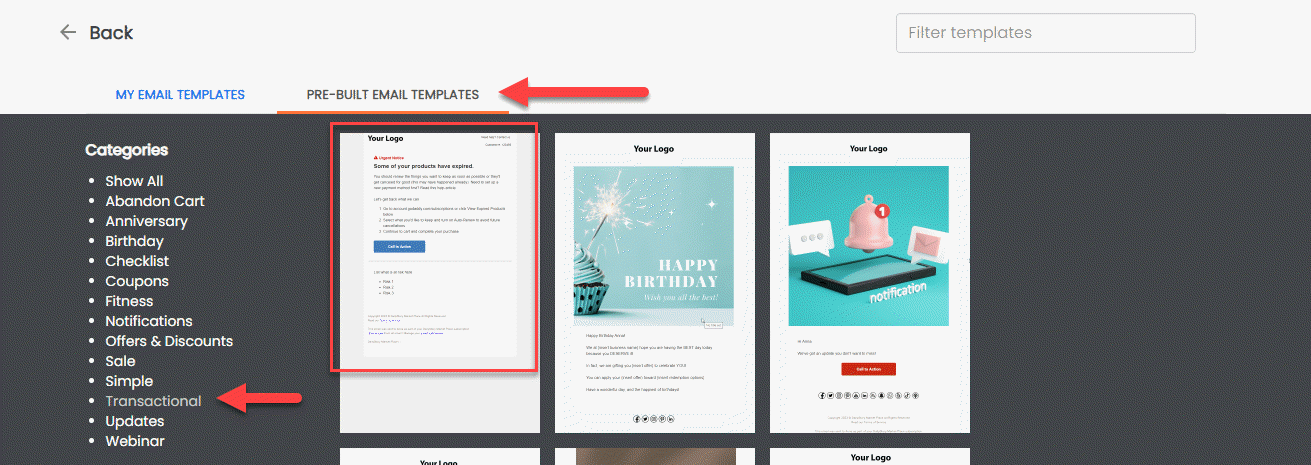
This will open the email templates. Select the Pre-built Email Templates tab, the Transactional category and click the first template in the list:
This will take you to the email settings screen. These options are detailed here. You can name the email whatever you like, for example Transactional Template.
Insert personalization tokens
Using a template for your transactional emails enables you to use all the power of the DailyStory drag-and-drop email designer. But, it requires that you add personalization tokens where you want replacements to take place.
For example, you may have several transactional emails to send using this template. Each, will use a distinct subject, preheader, logo and body. To accomplish this we’ll need to insert personalization tokens.
Subject and preheader tokens
The first token we’ll set up is the subject line: {{@ profile.email_subject}}. and next we’ll set another token for the preheader: {{@ profile.email_preheader}}.
We’ve used the names email_subject and email_preheader, but you can use any value you would like.

Logo and body tokens
Next, Click Save Changes and click Design Email. In this step you’ll need to edit your email and replace or remove content with your personalization tokens. For example, we’ve set a personalization token for the body as well as the CTA button’s text and URL:

Finally, Save & Close the designer – you can always update/change this template later. This should take you back to the campaign.
Sending your email with the API
Now that you’ve created the email with the personalization tokens, let’s send the email using the DailyStory API.
You may want to open a text editor to keep track of the details needed in the next few steps.
Mark as Transactional and get the Email ID
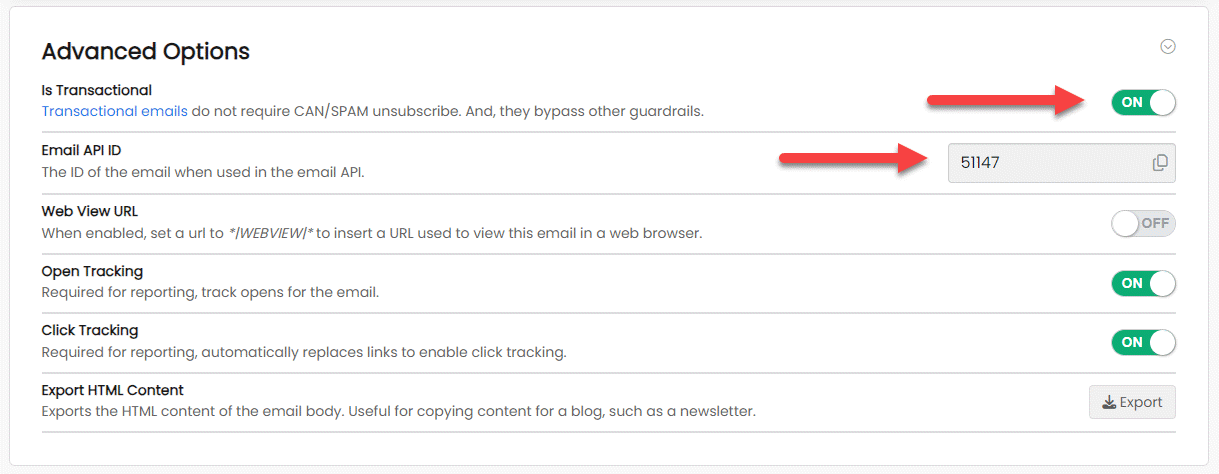
Navigate to the transaction email you created above and expand the email’s Advanced Options. Mark Is Transactional to on and copy the Email API ID:
Get your Site URL
Your Site URL is unique to your account. This is the URL you will send API requests to.
Navigate to Account Settings > Website. Copy the Site URL.
Your site URL looks like: https://us-1.dailystory.com/.
Get an API Token
Your API Token authorizes your access to your DailyStory account.
Navigate to Account Settings > API Tokens. Copy or create an API token.
Send the email with the email API
Now that you have the email ID and the API token, we’re ready to send the email. We’ll use the Send Email API to send our transactional email.
For the purpose of this example, we’ll use Postman. It’s a great tool for testing out APIs.
First we’ll set the URL. This should look something like:
https://us-1.dailystory.com/api/v1/email/send/[email id]?email=[email address]
- [email id] – the DailyStory Email API ID.
- [email address] – the person you are sending the email to
Next, you’ll want to set the Authorization to “Bearer” and past the API Token into it:

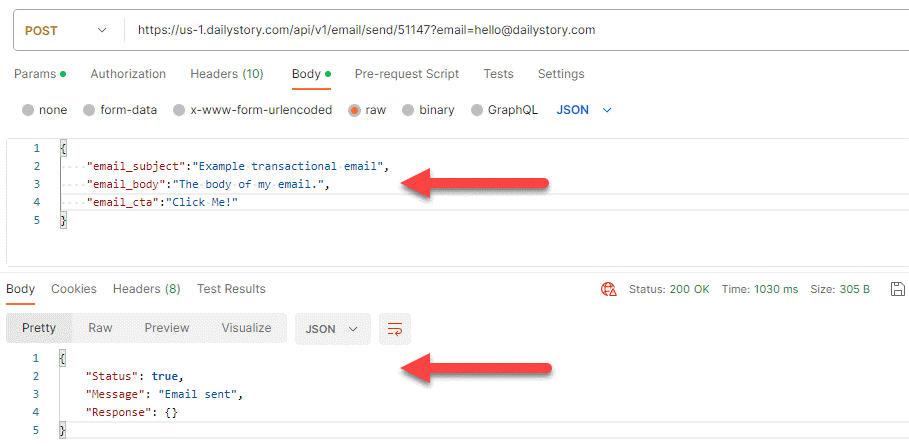
Next, set the body of the email to the personalization parameters and send the message.
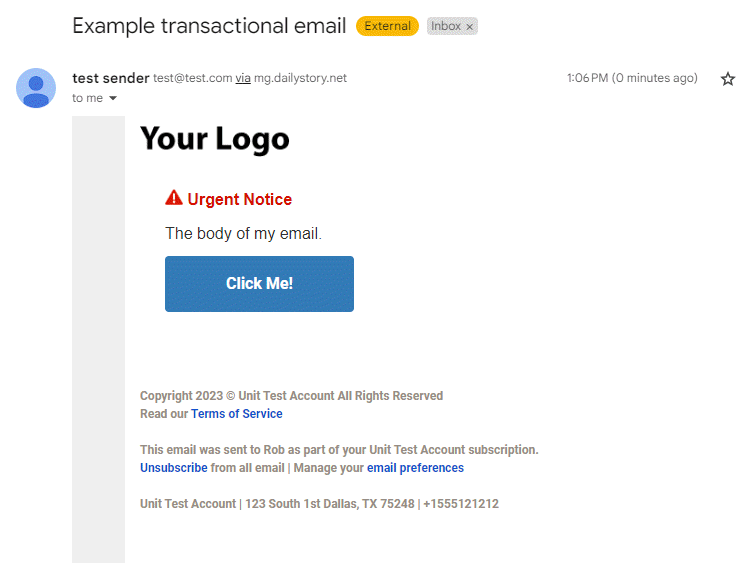
You should receive an email in your inbox, here is the one from this example:
