Using on-demand webinars as a lead magnet
At DailyStory we try to host a free webinar at least once a month. And, we always record the webinar and host in on our website so it can be viewed again. But more importantly – we use it to attract potential customers!
The purpose of this tutorial is to walk-through the technical steps for how we generate leads from on-demand webinars through the use of web forms and WordPress integration.
This tutorial can be used for any type of lead magnet on your website, in our example we’re using a webinar.
It’s important to mention that the technique demonstrated in this tutorial is not meant to be secure. Rather to create enough friction that submitting the form is easier than working around the form.
What you will need to follow along in this tutorial
To follow this tutorial step-by-step you’ll need the following:
- DailyStory account – you can start for free.
- WordPress – any WordPress site will work.
- DailyStory WordPress plugin – this makes using DailyStory in WordPress easier.
You’ll also need some familiarity with JavaScript and feel comfortable editing WordPress php template files.
Create a Landing Page and Form Page in WordPress
The first step is to create two pages in WordPress:
- Lead Magnet Landing Page – this is the landing page where the lead magnet resides, such as a hosted webinar
- Lead Magnet Form Page – this is the page that hosts the form that must be submitted to access the landing page.
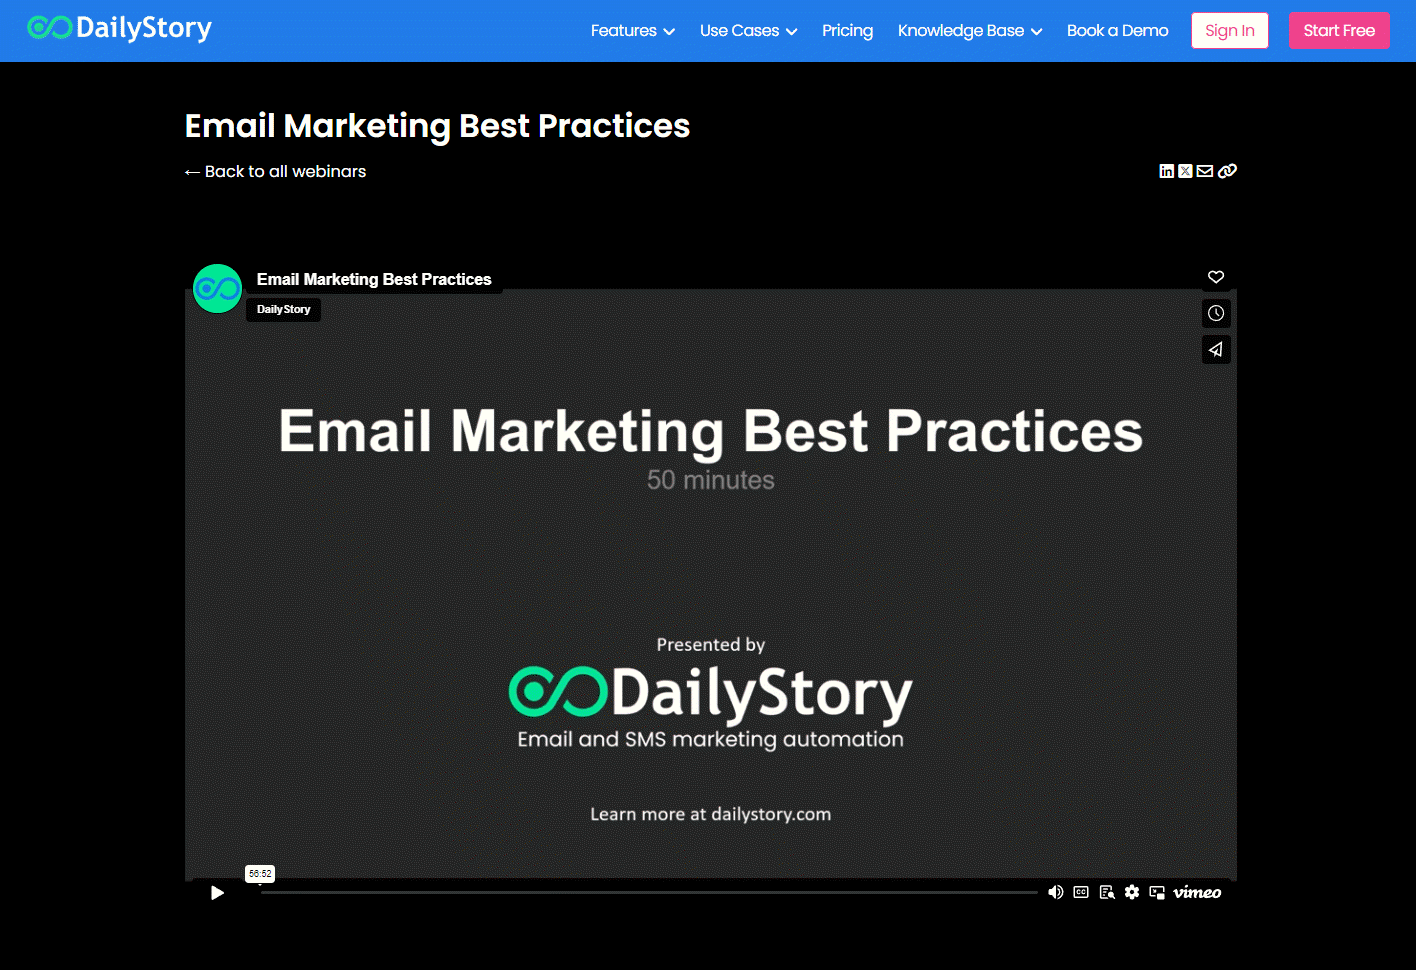
Lead Magnet Landing Page
Below is a screen shot from our Email Marketing Best Practices webinar. We publish our webinar recordings on Vimeo and then use Vimeo embed tags to host the video player.
There are two things we need to add to this page.
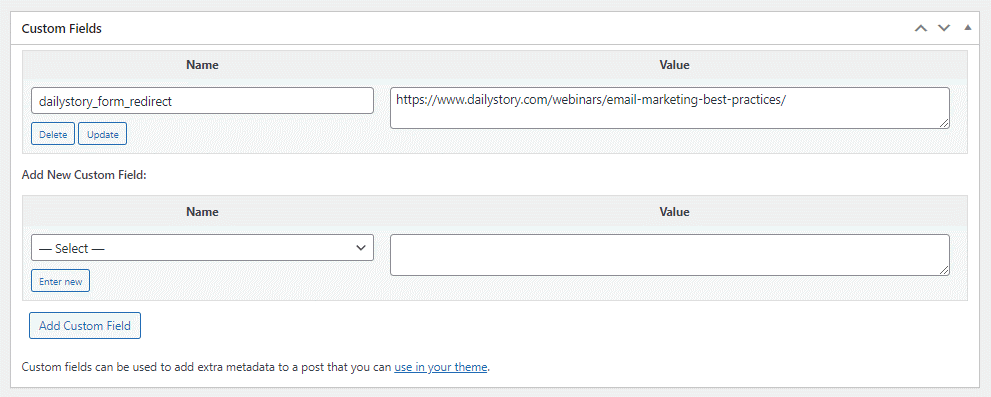
Add a custom field in the WordPress page
The first is a custom field in WordPress. You can find this option when editing a page in WordPress, just scroll down to the bottom.
The name of the custom field doesn’t matter, but the value of the custom field needs to be the URL to your lead magnet form page. We’ll need this value to redirect visitors to the lead magnet form page if they haven’t submitted the form.
In our case this value is: https://www.dailystory.com/webinars/email-marketing-best-practices/
Modify the PHP and add some JavaScript
Next, we need to add some PHP code and some JavaScript. In this case you’ll need to modify the PHP template file used to render the page you are editing. In our case we are using categories and we’ll edit the single-webinar.php file.
First, let’s add the PHP code:
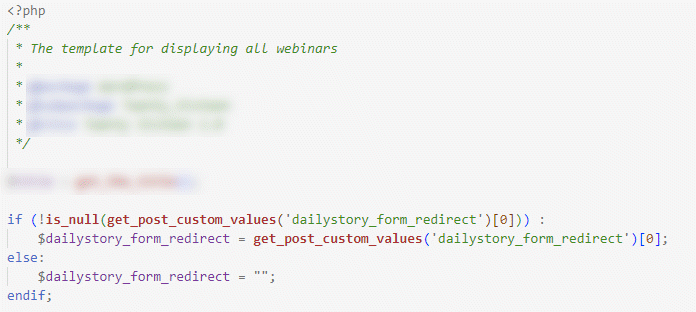
This PHP code sets a local variable $dailystory_form_redirect to the value set in our WordPress custom field dailystory_form_redirect:
$dailystory_form_redirect = get_post_custom_values('dailystory_form_redirect')[0];Next, we need to add some JavaScript in the footer of our page. This JavaScript is used to determine if the person viewing the page has completed the form required to view the on-demand webinar.
It’s important to note here, that this is not meant to be secure. It is meant only to create enough friction in the user experience to enforce registration. We’ll simply use the browser’s local storage to check to see if we have a value for ‘ds_form_submit’. If we do not, we’ll redirect the browser to the value set in the dailystory_for_redirect custom field.
<script>

    document.addEventListener('DOMContentLoaded', function() {

        const registered = localStorage.getItem('ds_form_submit');

        const redirect = "<?php echo $dailystory_form_redirect ?>";


        if (redirect.length > 0 && !registered)

        {

            console.log("Not registered. Redirecting...");

            console.log("<?php echo $dailystory_form_redirect ?>");

            window.location.href = "<?php echo $dailystory_form_redirect ?>";

        } else {

            console.log("Registered or not required.");

        }

    });

</script>
The ds_form_submit is a value that DailyStory sets in the browser’s local storage whenever a DailyStory form is submitted. If the value exists, it means the person has previously submitted a form.
Now our landing page is complete. When a visitor attempts to access it, if they have not registered they will be redirected to our form page.
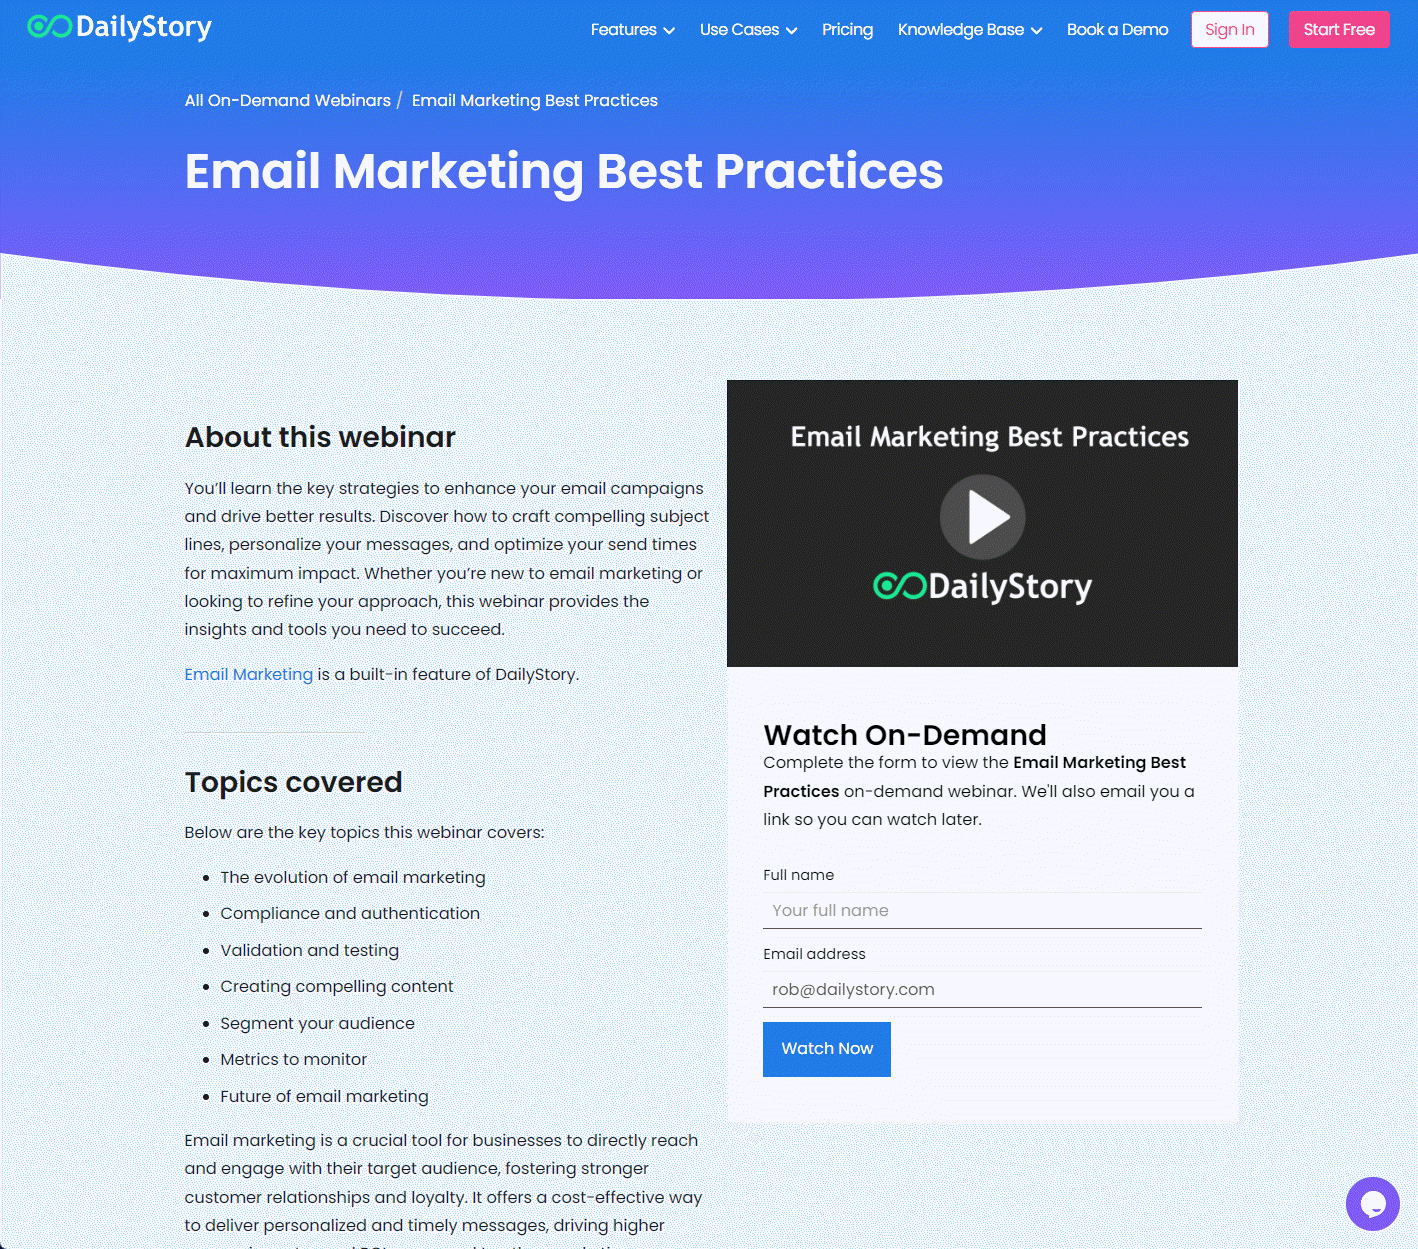
Lead Magnet Form Page
The Lead Magnet Form Page is the page that visitors will receive if they attempt to access the lead magnet without registering. We’ll provide some details about the webinar and include an HTML form that visitors must complete to watch the webinar on-demand.
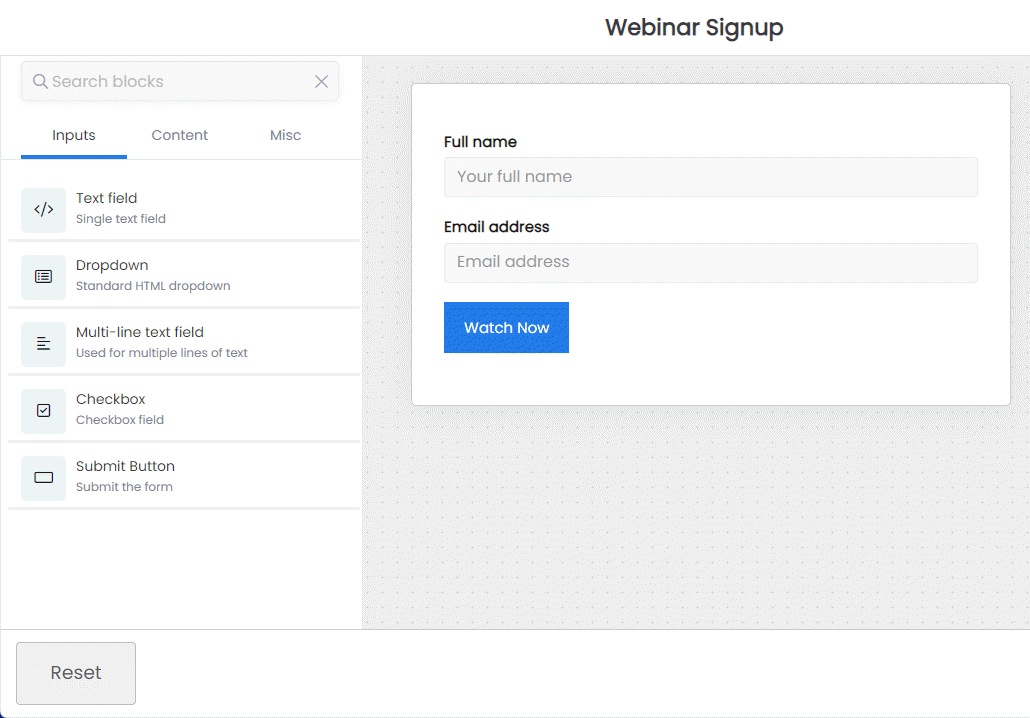
Create a web form in DailyStory
Step one is to create a web form in your DailyStory account. DailyStory provides a drag-and-drop form builder that makes it easy to quickly create a form. Below is the web form designer where a simple form was built to collect name and email address.
When a web form is submitted the contact data is used to create a new record in the campaign the web form is associated with. And, you can also create an automation to send notifications, emails, text messages, Slack messages, and more when the web form is submitted.
Embed your web form using a WordPress short code
Next, edit your form page in WordPress and add the DailyStory web form short code. You’ll need your web form id and the URL to your lead magnet. For example, a web form ID might be Kt837F and the URL to the lead magnet may be https://www.dailystory.com/webinar/email-marketing-best-practices/.
Note, the DailyStory WordPress plugin must be installed for the web form short code to work.
[ds-webform id="Kt837F" redirect_url="https://www.dailystory.com/webinar/email-marketing-best-practices/"]
The redirect_url parameter is optional. It redirects the browser to the provided URL after the form is submitted successfully. This is useful for situations where you create a single form and use to for multiple lead magnets. You could optionally create a separate form for each lead magnet too.
In Summary
We’ve created 2 pages in WordPress. One hosts a DailyStory web form and the other hosts our on-demand webinar. When the form is submitted we redirect to the on-demand webinar landing page. If the landing page find the ds_webform_submit value in local storage the page is shown, if not it redirects back to the form page.
What we didn’t show is what happens in DailyStory:
- New lead created when form submitted
- Automatic notifications sent
- Optionally run automations, such as a follow-up thank you email